Cook the books - The Complete Guide to Baking
Photography by David Parker.
Our practical recipe book reviewer, David Parker, tries his hand at a French baking staple – the humble croissant.
The Complete Guide To Baking; Bread, Brioche and Other Gourmet Treats, is a tomb of a book, from the same series of cookbooks as Patisserie; Master The Art of French Pastry, which I had previously reviewed. The two books look very similar, they're both massive (almost A3 in size) and feature the distinctive but simplistic, illustrations of the baked goods on the cover.
For a brief second I breathed a sigh of relief, thinking I had already done this book. But I hadn't. The last book was not a particularly enjoyable experience for me, first, I had to find a recipe that was realistic to attempt; most of the recipes in Patisserie were very equipment heavy or contained ingredients I had no hope of finding in a domestic retail store, or in any less than commercial quantities that I'd never use again.
Sure, if you were serious about making french pastries at home and were going to do it fairly often it'd be a pretty good bible for that but for your casual home baker-part-time recipe book reviewer, it was a little much.
This book isn't nearly as daunting, that's not to say bread baking doesn't take skill, but I took it home with a little less trepidation than revisiting french pastry. Browsing through the book, I saw something that I'd always wanted to try; croissants. I've looked up recipes for them more than a few times but always felt intimidated by the whole process (see folding, butter, more folding etc.) But I figured now was as good a time as any to give it a go.
The recipe called for fresh bakers yeast and I felt very smug in knowing what I believe to be the only place in Auckland selling it; Sabato in Mt Eden. The recipe also called for 'pastry flour' in the ingredients list. From reading online you can make an approximation of pastry flour (which has slightly less gluten than plain flour) by using a mix of plain flour and corn flour, however, I was then mixing the lower gluten pastry flour with the higher gluten strong flour, so I went for slightly more plain flour and slightly less strong flour.
I weighed out all of the ingredients for the dough the night before and kept wet and dry ingredients separate from each other and then set myself an alarm for 6am. Not what I'd normally choose as an ideal time to clamber out of bed on a Sunday morning. Fortunately, I had a stand mixer and after pouring my measured milk over the flours, caster sugar salt and bakers yeast, I could set the mixer on slow for 5 minutes before moving the speed to medium, for a further 5 minutes. I was glad that I was not attempting to measure out ingredients in my bleary eyed state at 6am.
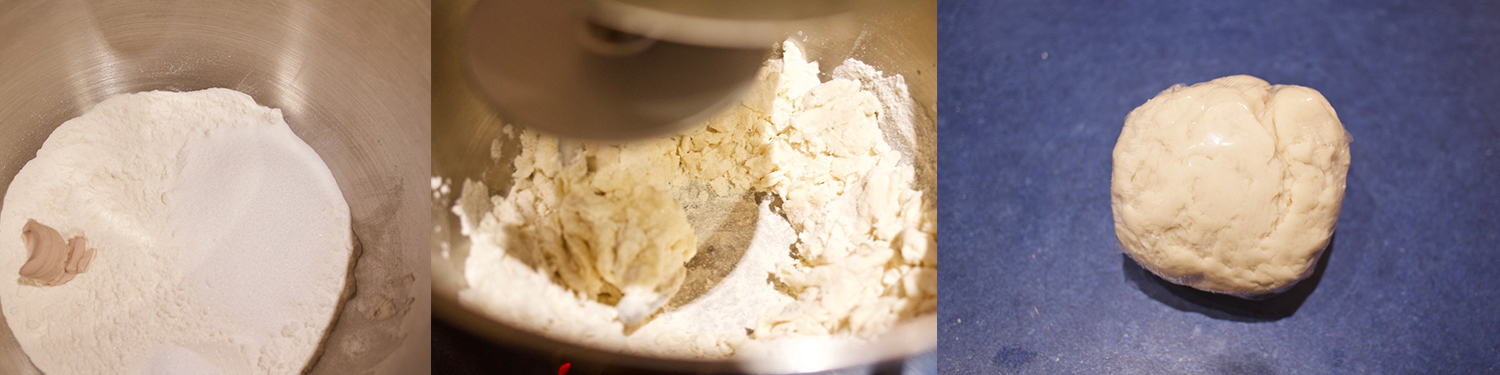
After kneading with a dough hook for around 10 minutes, I wrapped the ball of dough in plastic wrap and put it into the fridge to rest for an hour while I attempted to crawl back into bed for a little bit. After an unsuccessful attempt at a napping I got back out of bed and began tapping the butter with a rolling pin, thankfully at this time, no one else was in bed anymore as what read as 'tapping' turned out to be a full on whaking, shaking the kitchen counter and everything in the draws below it to make any sort of dent in the butter.
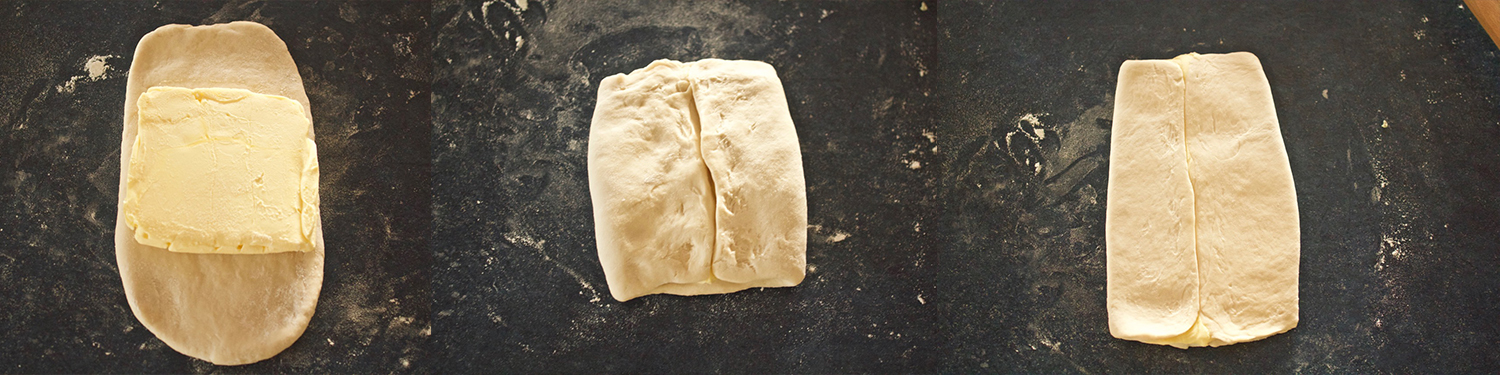
After a little more persuading, I was able to roll the butter between two sheets of baking paper into a square. Then I rolled out the dough to be a rectangle of the same width as the square but twice as long. Then I placed the butter square in the centre of the dough and folded the edges of dough around the butter. I then turned the parcel 90 degrees and rolled it out parallel to the seam, to be 3 times the width of the square of dough.
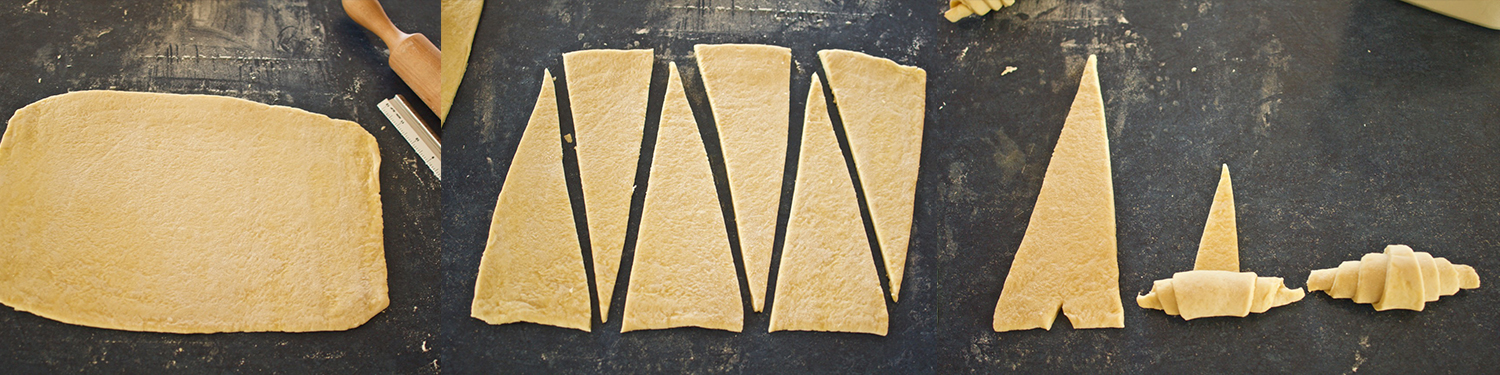
Then I folded the dough in 3 and placed in the freezer for 10 mins, then into the fridge for 30 minutes. Then I repeated the process of rolling out vertical to the folds, folding in 3, freezing and refrigerating 2 more times.By this point it was about 10am, finally, it was time to make the dough into croissants. I rolled the dough out until it was about 2.5mm thick which actually took me quite a bit of time as the dough was fairly tough to roll out by this point. Then I cut the dough into triangles, cut a little nick in the base of each triangle, stretched the bottom out a little and rolled into a croissant shape. I was really worried about how getting to this point so I was incredibly happy with my little croissants and I hadn't even baked them yet.
I made the glaze from egg, milk and a pinch of salt whisked together and strained through a sieve, then I brushed the croissants with the glaze and left them to rise for 3 hours uncovered. I guess the point of the glazing them before rising was to stop a crust forming maybe?
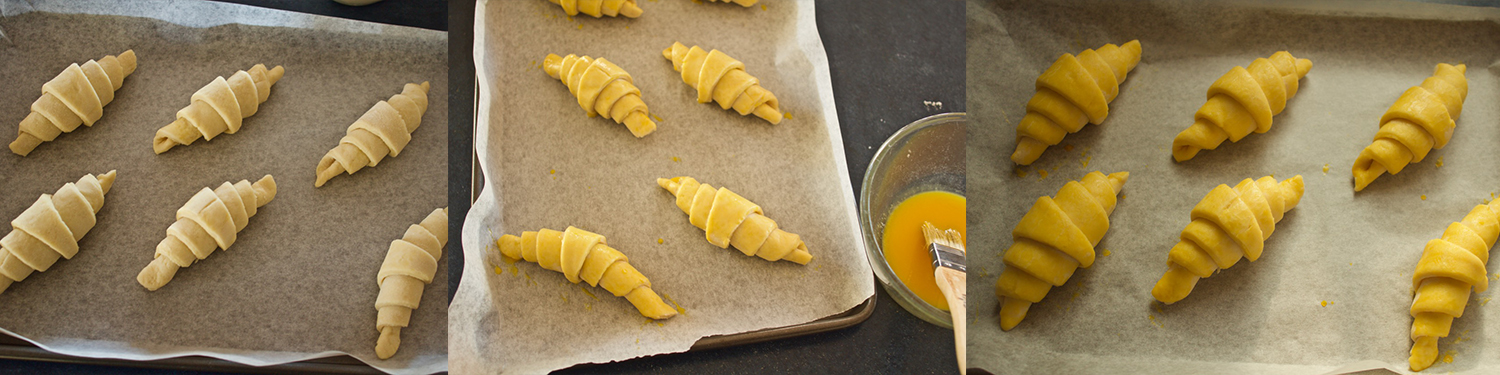
It was a fairly cool day and I think in hindsight I should've left them for a bit longer or tried to heat up a smaller room for them to rise in as the suggested temperature for the room was 25–28°C but they'd definitely grown in size and by this point I just wanted to eat a delicious croissant. Fortunately, after glazing again they only needed to bake for 15 minutes.
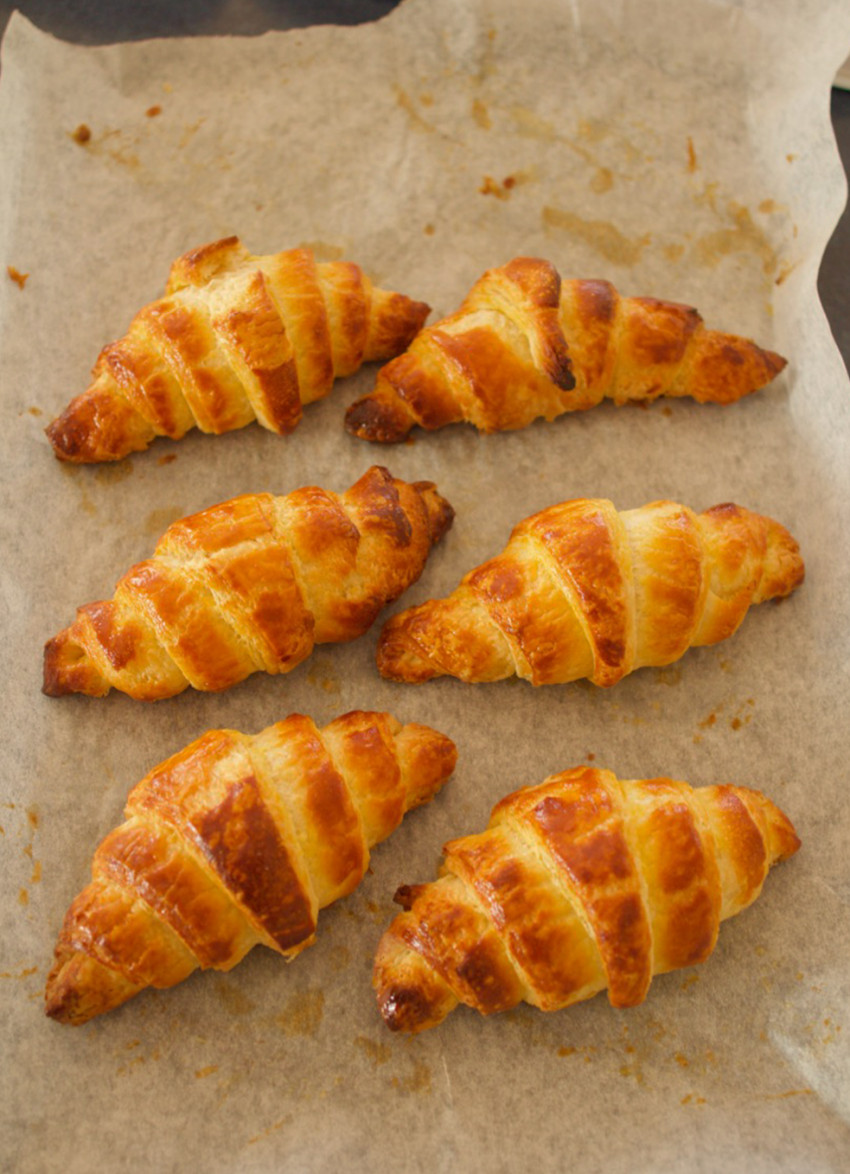
And then all of a sudden, there they were; flaky, buttery, warm, soft croissants. Hours of patient folding and rolling and kneading and rolling were suddenly (almost) worthwhile when I bit into a croissant that I had made! As I said before my croissants weren't 100 per cent perfect, they were definitely a little on the heavy side, I'm not sure if I had rolled them up too tightly or it was the temperature of the room but they hadn't risen quite enough, they were a bit bready in the centre, they definitely had all of the layers and air pockets had formed but not quite enough for the perfect croissant.
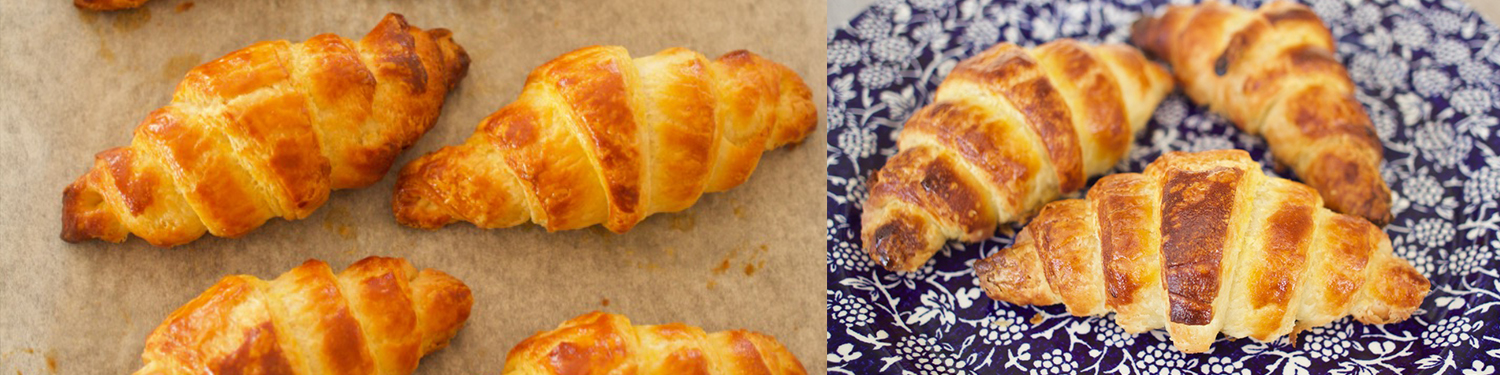
Let it be known, I am not at all ashamed of my first attempt at croissants and no one was turning them away either, I easily munched through two with a generous spread of lemon curd. Even with them being a little heavy, they were head and shoulders above some I've tried in my lifetime. My only real complaint? There weren't enough croissants.
Related Content


latest issue:
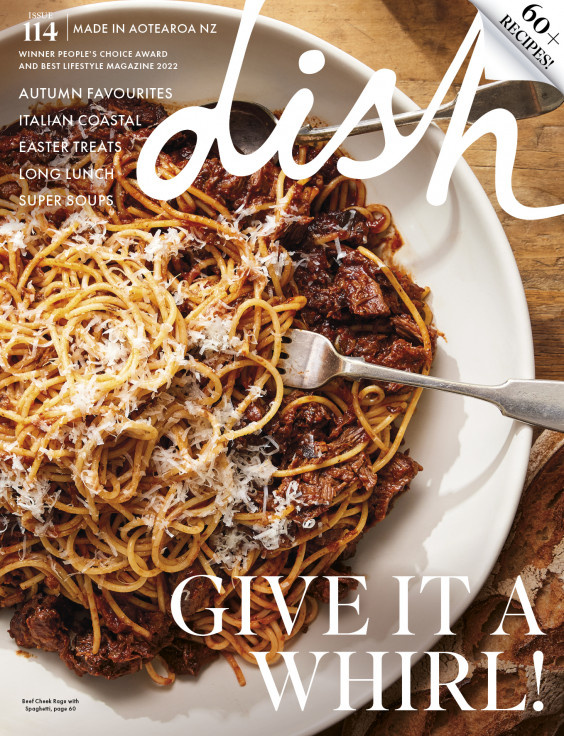
Issue #114
Autumn has arrived, and with it, the latest issue of dish, jam-packed with recipes that will have you fizzing to get in the kitchen! With a long Easter lunch featuring perfectly pink, blushing roast leg of lamb and wildly decadent baked mashed potatoes with caramelised onions, to simply scrumptious chocolate treats and sensational seasonal baking this issue has you covered - we reckon the Hot Cross Buns are our best yet! Salads make way for soothing soups, pies, puddings and our cover star beef cheek ragù with spaghetti – a must-make dinner for family and friends. With over 60 recipes in our latest issue there’s plenty of inspiration to keep you busy – and well-fed! Don’t forget to share your dish dishes with our Facebook community.